
First, you need a pic with some big, fluffy, contrasty clouds - if they are layered, that's even better. I can't help you with this part, you're just going to have to keep your eye on the sky and wait for the right day!
here's a good example:

notice how there is already some depth to these clouds as they recede into the distance - that's exactly what you want. This photo was processed using the clarity filter on camera+. I hate how grainy it looks, but i want all the shading and detail and i'll take care of the graininess later.
Next, you need to use an app that allows for selective blurring. I used big lens, but you could also do this with filterstorm or blur fx or any number of other apps, i'm sure. I like big lens because of the additional filters, which i will show you.

Once you've imported your photo into the app, you should choose "advanced" where you can start masking the area you want left sharp and unblurred.

you don't have to be super fussy here. the auto button can be quite handy if you are selecting something with strong edges - you can be really sloppy and hit auto and it will make the outline perfect. it is less useful for something like this, so you're just going to select some of the clouds and hit the arrow on the top right.

Now you can zoom in and out and adjust your focused and blurred areas. it's pretty intuitive - two finger pinch gestures to adjust the size, tap the focus or blur buttons to come up with a slider to adjust your brush size.

Once you've selected your focused areas, you can hit the aperture button to adjust the amount of blur. the lowest number is the most blurred, as in the example above. Now, you can hit the layers button to the right of the apertures to see if you like it better with a solid blur, like above or a graduated blur like the example below.

See how the water in the foreground is less blurred? I prefer this one, it gives some context and perspective and brings the focused clouds in closer.
Next, you can play with the different filters, and there are some pretty good ones here that will really make your focused areas pop. They are also all adjustable with a slider, which i like.
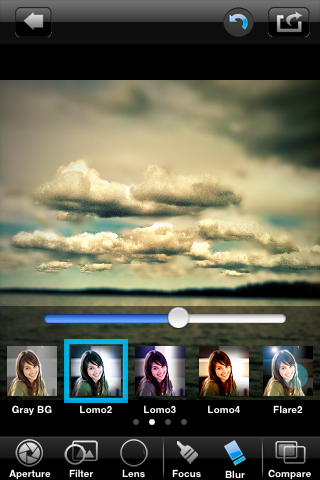


now, you can pick your lens. this will affect the shape of the bokeh in your blurred area. it won't really work with this photo, though because the bokeh is the light and in this case the lightest areas are focused. here are a couple of examples using a different photo.


As it happens, I prefer the colour of my original photo, so i'm going to stick with that. To finish off, i used filterstorm to increase my saturation and, most importantly, to remove the noise because i hate that graininess. Here's my finished product.

Tada! now it's your turn!
Check out 80sgirlart on etsy!
No comments:
Post a Comment